Presets vs. Filters: The most important difference explained
A photo can look almost finished and yet still give the feeling that something is missing. Perhaps the colors seem a bit flat, the light too cool, or the entire image doesn't convey the desired mood. Many photographers then ask themselves: How can I edit a photo? Beginners, in particular, quickly encounter two terms: presets and filters.
At first glance, both seem similar. Both allow you to quickly change the style of a photo. They can make an image appear warmer, clearer, softer, or more dramatic. However, they are different tools. Filters usually provide a quick visual effect, while presets often serve as a flexible starting point for further editing.

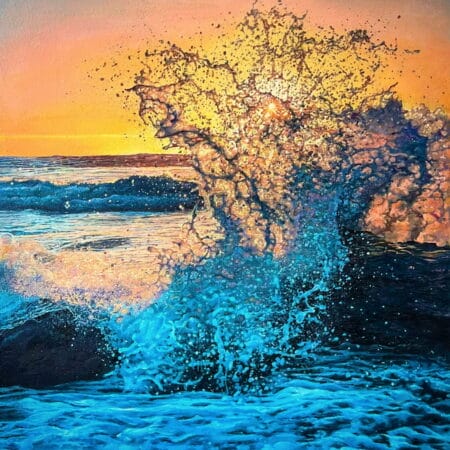
Photo by Zulfugar Karimov @zulfugarkarimov, via Unsplash
In this article, we explain the key differences between presets and filters and show how both affect your photos.
Show table of contents
What are presets?
A preset is a saved combination of multiple editing settings. With a single click, various aspects of a photo can be adjusted simultaneously – including exposure, contrast, color, sharpness, and the overall mood of the image. Instead of trying each slider individually, you get a pre-made look that serves as a starting point for further editing.
In Luminar Neo, you can find presets in the Presets Browser. There, you can browse various collections or view suggestions tailored to the currently open photo. Whether you're looking for a style for portraits, travel photos, landscapes, or social media content, you can try out different looks and compare them.
Presets are not finished products. They serve as a foundation that you can customize to your liking. You can reduce the intensity, change individual settings, and if you are satisfied with the result, you can save your own version for future projects.
The goal of a preset is not to alter or overwrite the original photo. It's meant to help you bring the image closer to the image you had in mind when you pressed the shutter.
Video tutorials for Luminar Neo presets
What are filters best suited for?
If you want to edit photos with filters to quickly change the mood of an image, filters are a practical solution. With just one click, a photo can appear warmer, brighter, softer, or more contrasty. This allows you to quickly implement style changes without having to manually adjust numerous settings.
The disadvantage becomes apparent, however, when the chosen filter doesn't suit the subject. A warm filter, for example, might work wonderfully for a street scene at sunset, but make a portrait appear too orange. A desaturated filter might be a good fit for a tranquil café scene, but could make a product photo look pale and less appealing. Since filters generally offer less scope for individual adjustments, they aren't always the best choice when a natural and balanced result is desired.
Video tutorials on working with filters in Luminar Neo
How do you choose the right option for your style?
Understanding how to edit images begins with a close look at the photo. Do you primarily want to change the mood? Or does the image need adjustments to light, color , and contrast?
First, define your goal and then choose the appropriate editing method. If you want a quick and easy result, a filter may be perfectly sufficient. This is especially true for stories, spontaneous travel photos, or images where the subject is already well-lit.
Presets are the better choice if you want consistent results and more creative control. They are particularly well-suited for image series from the same shoot. A street photographyseries, a family shoot, or a vacation album often looks more harmonious when colors and contrast are coordinated.
In Luminar Neo, you can start with a preset and then customize the result, ensuring each image retains its own unique character. After applying the preset, check the face, clothing, and background separately. If the skin appears too warm or the shadows too harsh, you can reduce the intensity or manually adjust individual settings.
Common mistakes you should avoid
When editing images – whether with presets or filters – even small mistakes can significantly affect the final result. Here are some common pitfalls and tips on how to avoid them:
- Don't immediately select the strongest filter or preset. Highly stylized effects can make colors look unnatural and obscure important details. Start with a subtle adjustment and gradually increase the intensity until the image still looks natural.
- Apply the same editing to every photo. Not every subject and lighting situation is the same. Editing that works perfectly for one image won't necessarily work for all others. Adjust the settings individually for each photo.
- Oversaturating colors can make skin tones appear unnatural and create distracting color shifts. Increase color intensity carefully and regularly compare the edited image with the original.
- to be lost. Check both the light and dark areas of your photo. If no details are visible there, the contrast is probably too high.
- Ignore natural skin tones. Intense color correction can make people appear too orange, too red, or too pale. Pay special attention to faces and adjust the colors so that the skin looks natural.
- Make the editing the main focus. If viewers notice the filter first and only then the actual subject, the effect is probably too strong. Take a step back and ask yourself whether the editing enhances or distracts from the photo. Reduce the intensity if the effect seems too dominant.
Conclusion
Both presets and filters can effectively enhance photos, but they differ significantly in their functionality and flexibility. Filters are particularly suitable for quick style changes, while presets offer more control and serve as a basis for individual adjustments.
Understanding these differences allows you to select the right tool for the desired visual effect. This ensures that every photo conveys the intended mood while retaining its own unique character.

Owner and Managing Director of Kunstplaza . Publicist, editor, and passionate blogger in the fields of art, design, and creativity since 2011. Graduated with a degree in web design from university (2008). Further developed creative techniques through courses in freehand drawing, expressive painting, and theatre/acting. Profound knowledge of the art market gained through years of journalistic research and numerous collaborations with key players and institutions in the arts and culture sector.


Featured Art


Design and Decor Highlights
-
 Sail Away - Metal art with four sailboats
83,95 €
Sail Away - Metal art with four sailboats
83,95 €
VAT included.
Delivery time: 3-5 working days
-
Female torso “Vibrant Curves” on a black marble base
295,00 €
VAT included.
Delivery time: 2-4 working days
-
J-Line "Striped Roosters" ceramic decoration set, 3 pieces
89,00 €
VAT included.
Delivery time: 3-5 working days
-
Handmade tapestry wall hanging "The Virgin", stretched on a stretcher frame and sound-absorbing
644,00 €
VAT included.
Delivery time: 10-17 working days
-
J-Line Medium Decorative Cushion made of 100% Cowhide Leather (Electric Blue)
Original price was: €89.9059,90 €The current price is €59.90.
VAT included.
Delivery time: 2-4 working days
-
Handwoven tapestry wall hanging "Tibetan Child" by Alison Wright, stretched on a frame and sound-absorbing
644,00 € – 944,00 €
VAT included.
Delivery time: 10-17 working days
-
"Mara" table lamp with satin black lampshade
182,00 €
VAT included.
Delivery time: 2-3 working days


