Why acoustics are part of the design
Colors, light, shapes, and textures guide the eye. The sound of a room guides the emotions. Anyone who has ever stood in a beautifully furnished loft and yet felt the urge to whisper knows this contradiction. A photographer recounted how her pop-up exhibition looked brilliant in a hall, while conversations in the hall were lost in the noise.
After just a few acoustic adjustments, the colors in the pictures appeared calmer, voices sounded closer, and the atmosphere became more intimate. First-class room acoustics make the design tangible. They focus the eye, reduce stress, and allow art, music, and conversations to truly shine.
How to read the room: reverberation, first reflections, zones
The quick check
Clap your hands and listen to the decay. A fluttering echo indicates parallel, hard surfaces, a long tail indicates too much reverberation. Smartphone apps can be used to roughly measure the reverberation time RT60.
For living spaces, 0.3 to 0.6 seconds is comfortable, while for concentrated work, 0.2 to 0.4 seconds is more suitable. Rooms with a lot of glass, concrete, or parquet flooring usually require more absorption than rooms with carpet, curtains, and bookshelves.
Initial reflections are found
Sit in the main seating area and have a second person slide a small mirror along the wall. The point where you see the speaker or conversation partner reflected in the mirror from your seated position is where the sound will first reach. These points are ideal for acoustic treatments, as they improve clarity and speech intelligibility.
Prioritize areas
Large, parallel surfaces create flutter echoes. Start at the side walls, the ceiling above the seating area, and the wall opposite large windows. Often, treating just 20 to 30 percent of the hard surfaces is sufficient. Placing your first acoustic panel at one of these primary reflection points often results in a surprisingly quieter room.
Material and aesthetics: wood, textile, color

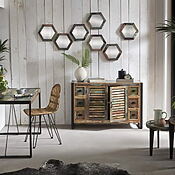
This image serves illustrative purposes and was generated by us using image AI.
Acoustic solutions don't have to look like a studio. Wooden slatted panels combine absorption and diffusion, while also adding warmth and texture to the wall. Combined with carpets , curtains, or a bookshelf, they create a diverse mix of materials that soothes both sound and visual appeal. It's important to consider the system as an integral part of the design, rather than an afterthought.
Wood radiates warmth
Light oak veneer complements black and white photography with a clean, modern look. Walnut accentuates earthy tones in paintings and sculptures. Vertical slats visually lengthen low ceilings, while horizontal versions widen narrow hallways. Choose a similar warm or cool tone to your furniture so the panels don't look out of place.
Color and rhythm
On accent-colored walls, dark slats create graphic contrasts; on neutral walls, they add depth. Repeat the rhythm of the slats in frame widths, shelf grids, or lines in artwork. A high-quality acoustic panel with a real wood surface reacts to light much like a picture frame, thus contributing to the overall aesthetic.
Application scenarios: Living room, gallery, home studio
Living room
Behind the sofa or around the TV wall, a treated surface reduces the echo of speech frequencies. A suspended ceiling solution above the seating area, mounted 3 to 10 centimeters away, improves the effect in the midrange. Combine this with a thick rug and a well-stocked shelf to act as a diffuser. This way, rooms remain lively yet quiet.
Gallery and Studio
Neutrality is key in exhibition spaces. Opt for frameless panels and calm, uncluttered surfaces in areas where many people are talking. In corridors, narrow strips that follow the walkway are sufficient. Be careful not to over-damp the acoustics. A balance between absorption and gentle diffusion allows art to breathe and prevents acoustic fatigue at openings.
Home studio
For podcasts, music, or videos, you need precision. Dampen the front wall between and to the sides of the listening position, and treat the ceiling and the opposite wall. In the room corners, use large, bulky elements to reduce low frequencies. A common mistake is to only work behind the workstation. First reflections near the listening position provide the quickest improvements.
Planning, assembly, maintenance
Plan in three steps:
- Analysis : Where is there an echo, where are the initial reflections, and which zones are communicative?
- Layout : Draw panel surfaces to scale and check proportions in the room.
- Implementation : A substructure made of slats aligns the walls; a mix of mounting adhesive and screws ensures a secure hold.
A small gap between the speaker and the wall often improves effectiveness in the lower midrange. Leave expansion gaps, run cables invisibly behind slats, and check baseboard and socket heights.
Three rules of thumb for lasting success
- Start with first reflections and large glass surfaces, not the smallest corner.
- A 25 percent targeted surface treatment brings noticeable peace and quiet to most living situations without completely muffling the room.
- Combine wood, textiles, and books or reliefs, as different surfaces resonate at different frequencies. Regular dusting with a soft cloth and occasional vacuuming are sufficient for maintenance. This preserves the visual quality, and the room will continue to sound as good as it looks.

Owner and Managing Director of Kunstplaza. Journalist, editor, and passionate blogger in the field of art, design, and creativity since 2011. Successful completion of a degree in web design as part of a university study (2008). Further development of creativity techniques through courses in free drawing, expressive painting, and theatre/acting. Profound knowledge of the art market through years of journalistic research and numerous collaborations with actors/institutions from art and culture.


